
- All
- Product Name
- Product Keyword
- Product Model
- Product Summary
- Product Description
- Multi Field Search
Author: Site Editor Publish Time: 2026-08-21 Origin: Site
Furnishing high-traffic, spatially constrained areas like entryways, small apartments, and narrow hallways requires a precise balance between utility and physical footprint. Standard furniture creates bottlenecks and visual clutter in tight spaces. Skipping furniture altogether eliminates vital drop zone storage for keys, mail, and everyday carry items. When you walk through a front door, you need an immediate surface to unload. Without it, items scatter across kitchen islands or dining tables. However, forcing a standard 15-inch deep cabinet into a 38-inch hallway violates basic building codes and creates a daily physical obstacle. We approach this by treating the console not just as decor, but as a functional architectural extension. You must account for baseboard thickness, door swing radiuses, and wall stud locations before bringing any piece into the house. Selecting the right narrow console table requires evaluating exact dimensional constraints, structural stability, material durability, and storage configurations. This guide provides a framework for measuring, evaluating, and shortlisting slim console tables that maximize utility without compromising spatial flow.
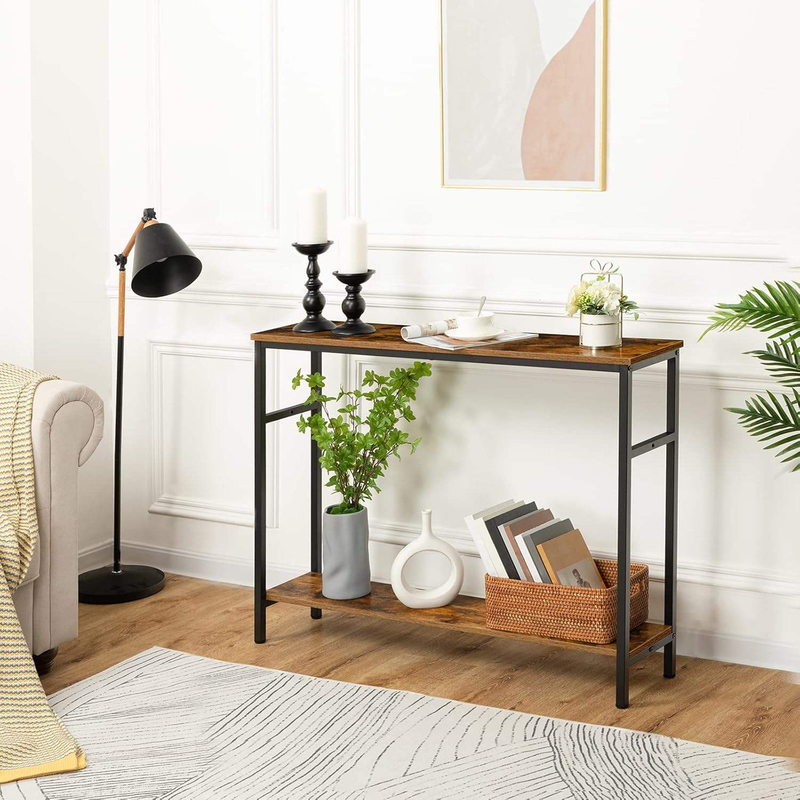
Dimensional Baselines: True narrow console tables feature a depth of 8 to 18 inches and a standard height of 28 to 34 inches, requiring precise measurement of baseboards and walking paths.
Proportional Scaling: Success relies not just on shallow depth, but on selecting the correct table length to match the adjacent wall or sofa without overwhelming the room's negative space.
Stability Requirements: Ultra-slim profiles inherently introduce tipping hazards; mandatory evaluation of wall-anchoring hardware and base weight distribution is critical, especially in renter scenarios.
Storage Trade-offs: Adding multiple drawers or cabinets increases utility but adds visual weight and physical depth, necessitating a choice between closed storage and minimalist, open-frame designs.
Placement Strategy: Successful implementation depends on matching the table’s structural design to its location (e.g., flush-to-wall entryway vs. freestanding behind-sofa placement).
Table of Contents
Residential building codes, specifically the International Residential Code (IRC), mandate a minimum of 36 inches of clear width for hallways. This is not a suggestion; it is a hard rule for safe egress. When you place furniture in a corridor, that 36-inch rule applies to the space remaining after the furniture is installed. Do not measure from drywall to drywall. Measure from the furthest protruding element. This is usually the baseboard shoe molding, a radiator valve, or a door casing. If your hallway is 46 inches wide wall-to-wall, but the baseboards take up 1 inch on each side, your true width is 44 inches. Subtracting the 36-inch clearance leaves you with exactly 8 inches for a table. You must also map out door swings. An inward-swinging front door needs a clear radius. Mark the door's path on the floor with painter's tape. Your furniture must sit completely outside this arc to prevent the door from smashing into the table edge during a hasty entrance.
The furniture industry defines a narrow console table as having a depth between 8 and 18 inches. Anything deeper encroaches on standard cabinet dimensions. Ultra-slim models drop down to 6 or 8 inches, serving strictly as mail drops or key rests. Vertical alignment requires just as much precision. Standard console heights range from 28 to 34 inches. You need to map the wall before selecting a height. Standard light switches sit 48 inches off the floor on center, while thermostat controls often sit at 60 inches. Wainscoting caps and chair rails typically sit between 32 and 36 inches. If your room has a chair rail at 36 inches, buying a 34-inch table creates an awkward two-inch gap that traps shadows and looks like a measuring error. Match the table height to the architectural lines already present in the room.
Depth keeps you compliant with building codes. Length dictates the visual weight of the room. A long, unbroken hallway looks like a bowling alley. A longer table breaks up that tunnel effect. Conversely, a tight entryway nook demands a compact footprint. We use the two-thirds rule for proportional scaling. The table length should never exceed two-thirds of the wall segment or the sofa it backs up against. If you have a 90-inch wall between two doorways, your maximum table length is 60 inches. Pushing a table end-to-end across a wall eliminates negative space. Rooms need negative space to feel open. Leaving 15 inches of bare wall on either side of the table allows the architecture to breathe. You can use that flanking floor space for functional items like a wet umbrella stand or a woven basket for dog leashes.
Form follows function. You must define the exact job this table will perform before looking at materials. A purely aesthetic display table holding a vase and a picture frame requires minimal structural reinforcement. A high-volume storage zone for a family of four requires heavy-duty engineering. If the table serves as a primary drop zone, it will take a beating. Heavy keychains, metal flashlights, and wet coffee mugs will hit the surface daily. If you need to store winter boots, the bottom shelf must clear at least 14 inches vertically and handle 50 pounds of static weight. Clarifying this use case prevents you from buying a delicate, glass-topped accent piece when your household actually needs a reinforced steel utility rack.
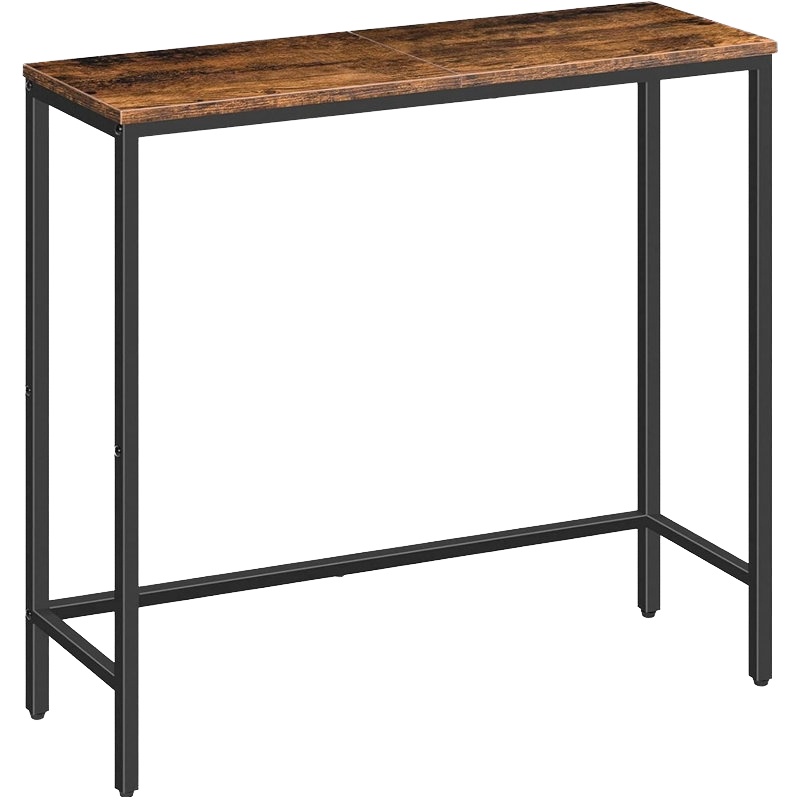
Physics works against slim furniture. When you reduce the depth of a table below 12 inches while maintaining a 34-inch height, you push the center of gravity dangerously high. A slight bump from a hip or a heavy backpack can easily tip it over. Mechanical stabilization is not optional; it is a requirement. Look closely at the base design. Sled bases feature a continuous floor runner that distributes weight evenly, offering better resistance to forward tipping. Four-leg frames are notorious for wobbling on uneven hardwood or tile floors. You must evaluate the anti-tip hardware included in the box. Throw away the cheap nylon zip-ties and plastic drywall anchors provided by most manufacturers. Use steel L-brackets and secure them directly into the wooden wall studs using 2-inch wood screws. If you live in a rental and absolutely cannot drill into the walls, you must artificially lower the center of gravity. Place solid steel weights, heavy stone planters, or dense books on the bottom-most shelf to anchor the frame to the floor.
Adding storage changes the physical mass of the table. Closed storage hides daily clutter but requires physical space. A functional drawer needs a minimum depth of 10 inches just to house the mechanical drawer slides. If you opt for drawers, look for undermount wooden glides rather than bulky side-mounted metal tracks, as side mounts steal an inch of internal width. Multiple shallow apron drawers work best. They give you a place to hide mail and keys without dropping the visual bulk down to the floor. Open shelving keeps the sightlines clear. Light passes through the frame, which prevents a narrow hallway from feeling like a cave. However, open shelving demands strict discipline. If you pile loose mail and dirty shoes on an open shelf, the space looks instantly chaotic. Hybrid designs offer the best utility. A single row of shallow top drawers handles the ugly clutter, while an open bottom tier holds decorative baskets or neatly arranged shoes.
Entryways are impact zones. Furniture here takes more abuse than anywhere else in the house. Solid hardwoods like white oak, hickory, or walnut offer high Janka hardness ratings, meaning they resist denting when you drop a heavy set of keys. Engineered wood, specifically MDF covered in a paper-thin veneer, will fail quickly in an entryway. The edges will chip, and if wet umbrellas or snowy boots sit on the lower shelf, the MDF will absorb the moisture and swell permanently. Welded steel frames provide the highest structural rigidity for ultra-slim profiles. Glass tops look light and airy, but they require daily wiping to remove fingerprints. Furthermore, tempered glass poses a shatter risk in tight corridors where people carry heavy boxes or move furniture. Stone and marble tops look premium, but placing a 40-pound slab of marble on a 10-inch deep frame creates a massive top-heavy tipping hazard.
Material Type | Impact Resistance | Moisture Tolerance | Best Application |
|---|---|---|---|
Solid Hardwood (Oak/Walnut) | High | Medium (Requires Polyurethane) | High-traffic family entryways requiring maximum durability. |
Engineered Wood (MDF/Veneer) | Low | Very Low (Will swell) | Low-traffic hallways or secondary display areas. |
Welded Steel / Iron | Very High | High (If powder-coated) | Industrial aesthetics and ultra-slim profile requirements. |
Tempered Glass | Low (Shatter risk) | High | Dark, cramped spaces needing maximum light flow. |
You cannot style a 10-inch deep table the same way you style a massive dining buffet. Weight management is your primary concern. Standard table lamps feature wide, heavy bases that will overhang the edge of a slim table. This overhang catches on coat sleeves and purse straps. A minor snag will pull a heavy ceramic lamp onto the floor. Source narrow-base lamps designed specifically for mantelpieces or slim consoles. Better yet, remove the lighting weight from the table entirely by hardwiring wall sconces or installing plug-in sconces above the surface. When placing decor, keep the heavy items low. Put lightweight wooden bowls or small picture frames on top. Anchor the bottom shelves with heavy art books, cast iron doorstops, or dense storage boxes.
When a hallway measures under 40 inches wide, floor-standing legs become a tripping hazard. Ultra-slim floating consoles eliminate the floor footprint entirely by mounting directly to the wall structure.
Installation Requirements: You cannot hang a floating console on drywall anchors. The cantilevered weight of the table, plus the items placed on it, will rip toggle bolts straight through 5/8-inch drywall. You must locate the wooden wall studs (typically spaced 16 inches on center) and drive 3-inch lag screws through the table's mounting cleat directly into the timber.
Clearance Advantages: Floating units allow you to set the exact height. You can mount it at 36 inches to match a wainscoting cap, or drop it to 28 inches for a low-profile look. It also leaves the floor completely clear, making vacuuming and mopping effortless.
Weight Limitations: Even when secured to studs, floating consoles have a lower maximum load capacity than floor-standing models. They are designed for keys, mail, and light decor, not for sitting on or holding heavy equipment.
Apartments and older homes frequently lack dedicated coat closets near the front door. A storage-heavy entryway table acts as a standalone mudroom.
Drawer Specifications: Look for tables with multiple independent drawers rather than one wide drawer. A single 40-inch wide drawer on a shallow table will bind and jam when pulled from one side. Independent 12-inch drawers pull smoothly.
Lower Tier Engineering: The bottom shelves must feature rigid support. Slatted wood shelves allow dirt and water from shoes to fall through to the floor. Solid bottom shelves contain the mess but require frequent wiping. Ensure the bottom shelf sits at least 4 inches off the floor so you can slide a broom underneath.
Hardware Quality: Inspect the drawer stops. Shallow drawers pull out quickly. Without heavy-duty mechanical stops, you will accidentally pull the entire drawer out of the frame, dumping the contents onto the floor.
Open-concept floor plans use furniture to define distinct living zones. A sofa-back console creates a physical boundary between the living room and the kitchen without blocking sightlines.
Height Matching: The table must sit one to two inches below the top edge of the sofa back. If the table protrudes above the sofa, it creates an uncomfortable hard edge right behind the seating area. Measure your sofa height with the cushions fully compressed.
Power Integration: Freestanding sofas rarely sit near wall outlets. Look for consoles with built-in power strips and USB ports. You can run a single heavy-duty extension cord under the sofa to power the table, giving you a convenient place to charge phones or plug in reading lamps.
Heat Dissipation: If you place electronics, chargers, or lamps on a table pressed tightly against fabric upholstery, you must monitor heat buildup. Ensure there is at least a half-inch air gap between the table edge and the sofa fabric to allow heat to escape.
Urban apartments and pre-war homes rely on bulky cast-iron radiators. These iron blocks consume prime wall space. A radiator cover console reclaims that footprint while hiding the ugly plumbing.
Thermal Dynamics: You cannot place a standard wooden table over a radiator. The constant cycle of extreme dry heat will warp solid wood, melt edge-banding glue, and crack veneers. Radiator consoles use heat-resistant MDF or powder-coated steel.
Airflow Requirements: The front and sides must feature extensive slating or metal mesh. Radiators heat rooms through convection. If you trap the air inside a solid box, the room stays cold and the furniture overheats.
Access Points: Radiators require maintenance. You need access to the bleed valves and the temperature control knobs. The top panel of the console should operate on a piano hinge, allowing you to flip it open instantly without moving the entire frame.
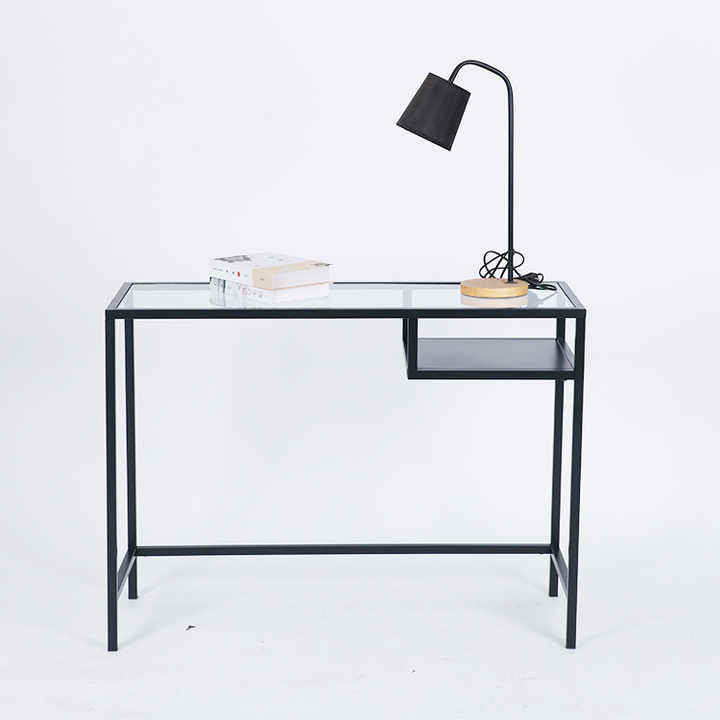
Baseboards are the enemy of flush furniture installation. A standard baseboard and shoe molding combination pushes the bottom of a table up to 1.5 inches away from the wall. This creates an ugly gap at the top and increases the tipping leverage. You have a few ways to mitigate this. Look for tables designed with inset back legs, where the rear legs sit two inches forward of the top edge. Alternatively, you can use a coping saw to scribe and notch the back legs of a wooden table to perfectly match the profile of your baseboard molding. Wall outlets present another obstacle. Before buying, measure the exact height and width of your wall outlets. Compare these numbers to the table's cross-bracing. You do not want a horizontal steel support bar sitting directly over your only hallway outlet. If the table has a solid back panel, you will need to use a hole saw to cut an access port for the plugs.
The way a table goes together dictates how long it will last. Flat-pack furniture relies on cam-lock fasteners. You insert a metal pin, drop in a circular cam, and twist it with a screwdriver. In deep, heavy furniture, cam-locks work fine. In a narrow, 10-inch deep frame, cam-locks fail. The lack of depth means there is very little material resisting lateral shear forces. Every time you bump the table, the cam-locks loosen slightly. Within six months, the table wobbles violently. To mitigate this, prioritize pre-assembled furniture using traditional joinery. Mortise and tenon joints, secured with wood glue, provide massive lateral strength. If you must buy flat-pack, look for systems that use wooden dowels and structural wood glue in addition to the mechanical fasteners. For metal frames, accept nothing less than fully welded joints. Screwed-together metal frames will squeak and rack out of square.
Every furniture purchase involves compromising between cost, aesthetics, and exact fit. Mass-market tables come in standard 12-inch or 15-inch depths. If your hallway allows exactly 10.5 inches of clearance before violating the 36-inch walking path rule, a mass-market table will not work. In these tight tolerances, commissioning custom millwork makes sense. A local carpenter can build a table to your exact fractional dimensions, scribe it to your specific baseboards, and finish it to match your trim. This costs significantly more upfront but solves the spatial problem perfectly. You must also weigh finish durability against price. A cheap paper veneer looks fine on day one, but it will peel at the corners after a few months of keys dragging across it. Investing in a solid wood top sealed with three coats of oil-based polyurethane costs more, but it provides a hardened shell that withstands daily impacts. When dealing with narrow furniture in high-traffic zones, you are paying for impact resistance just as much as you are paying for the design.
Grab a tape measure and record the exact distance from your baseboard to the opposite wall to establish your absolute maximum depth.
Locate and mark the wall studs in your target area using a magnetic stud finder to prepare for anti-tip bracket installation.
Inventory the specific items you plan to store on the table to determine your exact drawer and shelving requirements.
Order heavy-duty steel L-brackets and 2-inch wood screws to replace the cheap plastic anchoring hardware included in most furniture boxes.
A: A standard narrow console table features a depth ranging from 8 to 18 inches. Ultra-slim models drop below 12 inches to accommodate extreme spatial constraints. These shallow depths ensure the furniture does not obstruct critical walking paths in tight hallways or small entryways.
A: Residential building codes dictate a minimum of 36 inches of clear walking space past any piece of furniture. Measure from the furthest protruding edge of the console table to the opposite baseboard. Anything less than 36 inches restricts movement and creates a daily physical obstacle.
A: Renters who cannot drill into wall studs must lower the table's center of gravity. Place heavy items like dense art books, solid stone decor, or weighted storage baskets on the lowest shelves. Avoid placing heavy lamps on the top surface, and utilize heavy-duty adhesive safety straps.
A: Yes, but you must use a specialized radiator cover console. These units require heat-resistant materials like powder-coated steel or high-temperature MDF, along with slatted fronts for convection airflow. Never place a standard solid wood console over a radiator, as the dry heat will warp and split the timber.
A: The ideal height sits one to two inches below the top edge of the sofa back, preventing the table from protruding above the upholstery. For length, apply the two-thirds rule. The table should not exceed two-thirds of the sofa's total length, leaving negative space on both ends.
A: Drawers on tables under 10 inches deep offer very limited utility. The internal drawer tracks and back panels consume valuable space, leaving only a few inches of usable interior depth. They work well for flat items like keys and mail, but cannot hold bulky items like tools.
A: Avoid standard lamps with heavy, wide bases that overhang the table edge. Select narrow-base lamps specifically designed for slim surfaces. Secure the lamp cord tightly to the back of the table leg to prevent accidental snagging, or install wall sconces to eliminate top-heavy tipping risks entirely.


